Install Laniakea dashboard (database and vault version)
Warning
Vault integration leverages on MySQL database. It can’t work with dashboard stateless version
Update the dashboard IAM client configuration
To enable Vault integration the token exchange is needed. Therefore, edit the IAM client previously created for the dashboard.
Enable token exchange accessing to the client configuration page as Administrator user, through the ADMINISTRATIVE, Manage Clients and check the flag token exchange in the Grant types section.

IAM client configuration for Vault
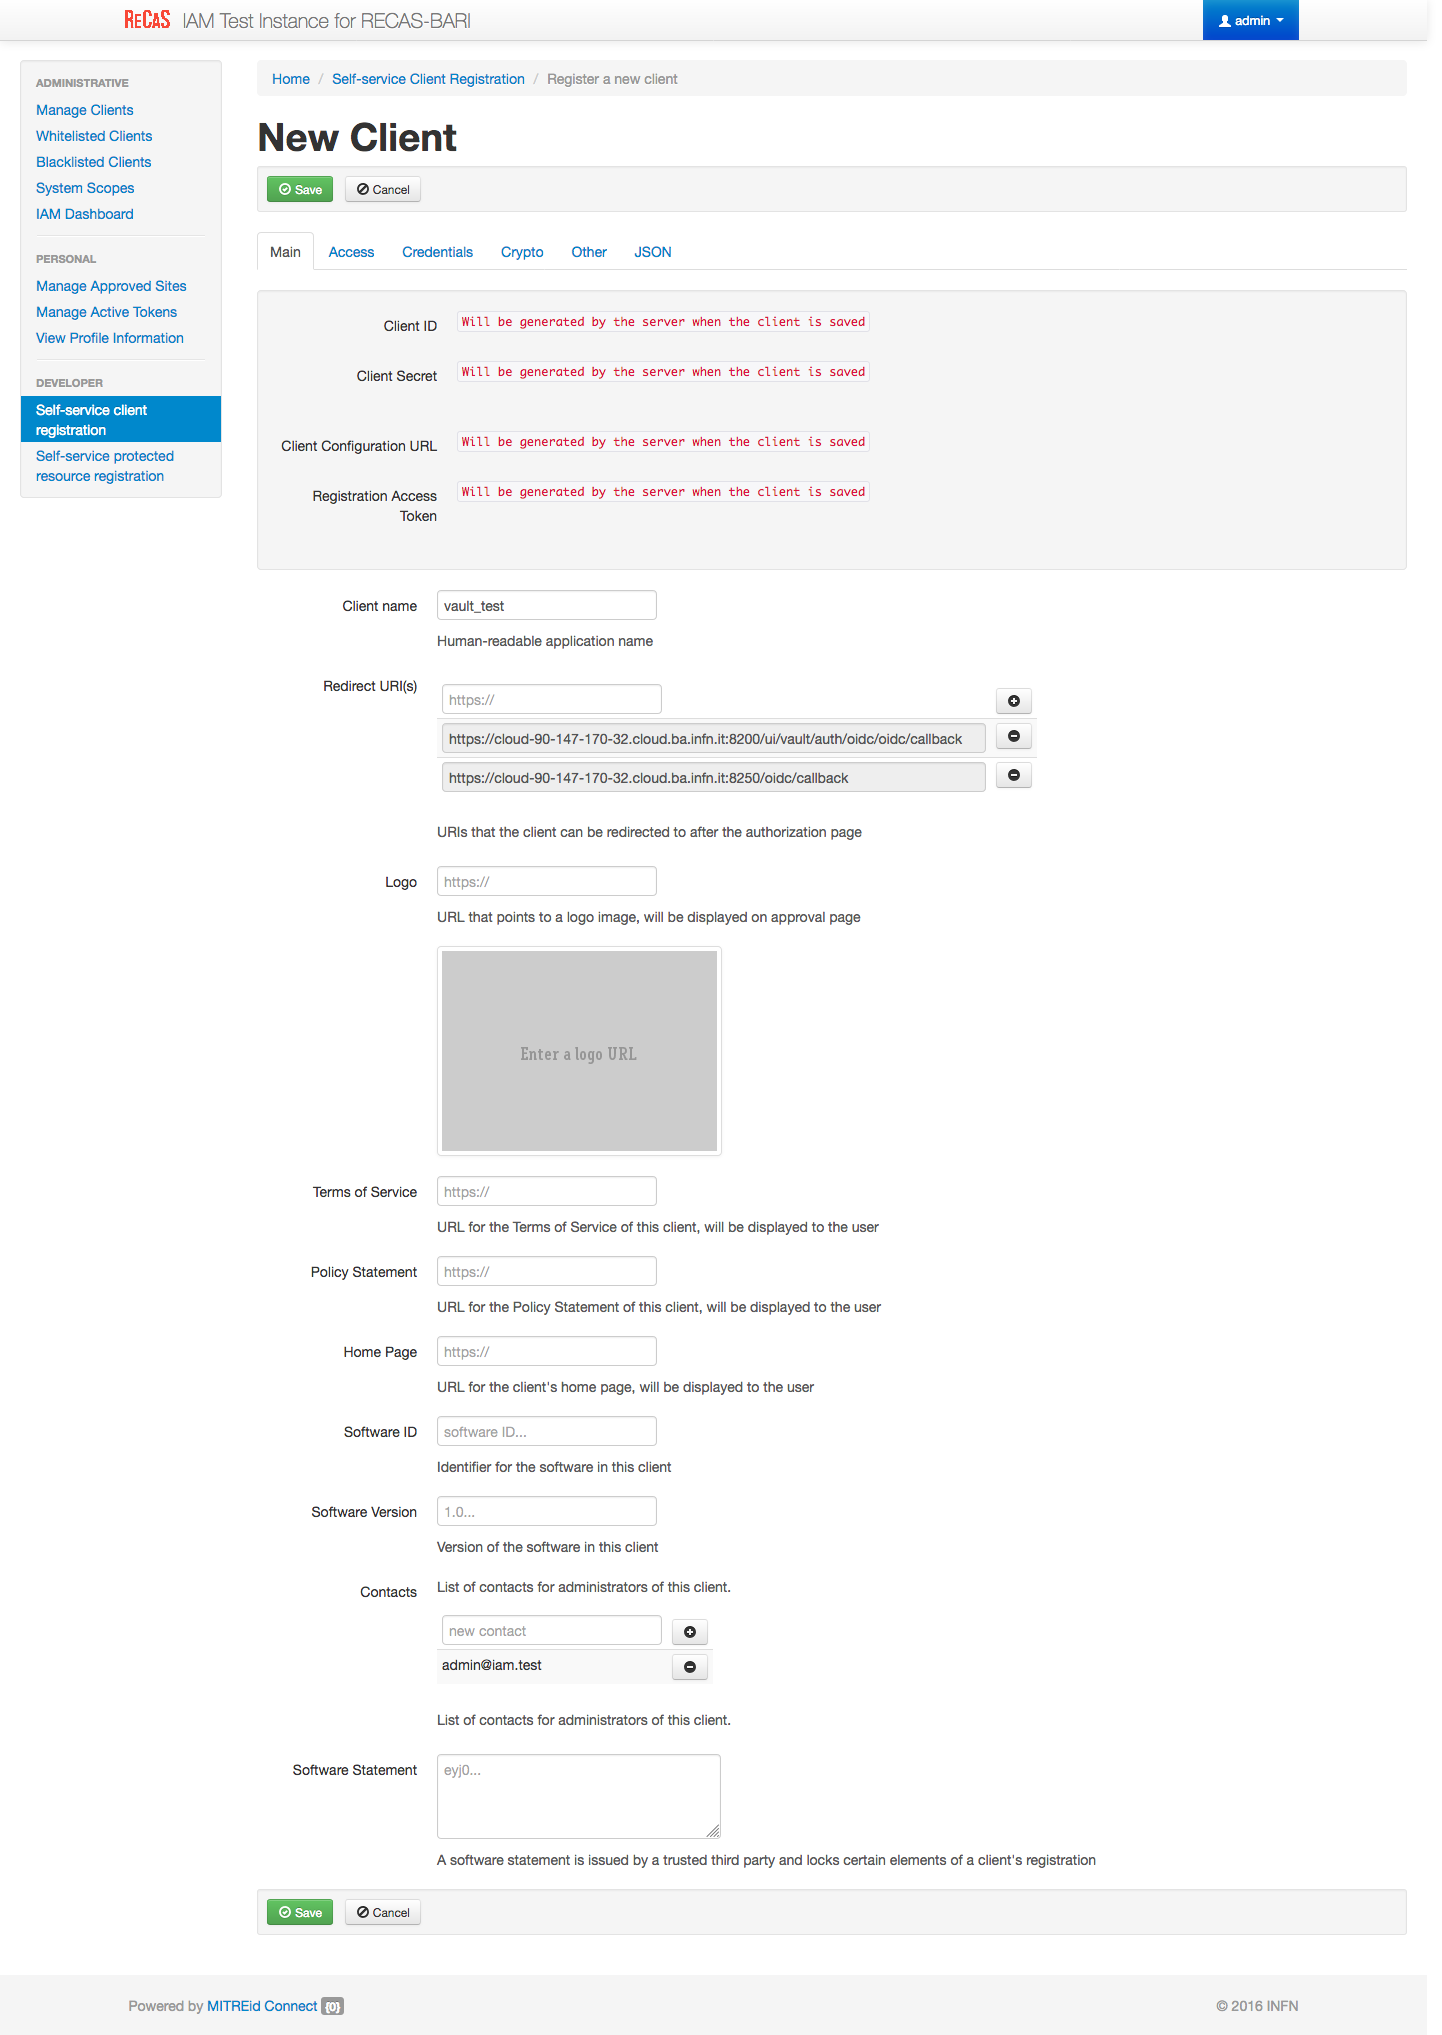
Create another IAM client for Vault, to enable oidc integration to authenticate users.
Login on IAM then MitreID Dashboard and select Self-service client registration as Administrator user.
Click on New client with the following parameters:
Client name: vault_client

redirect URI(s): https://<dashboard_vm_dns_name>:8200/ui/vault/auth/oidc/oidc/callback
                 https://<dashboard_vm_dns_name>:8250/oidc/callback
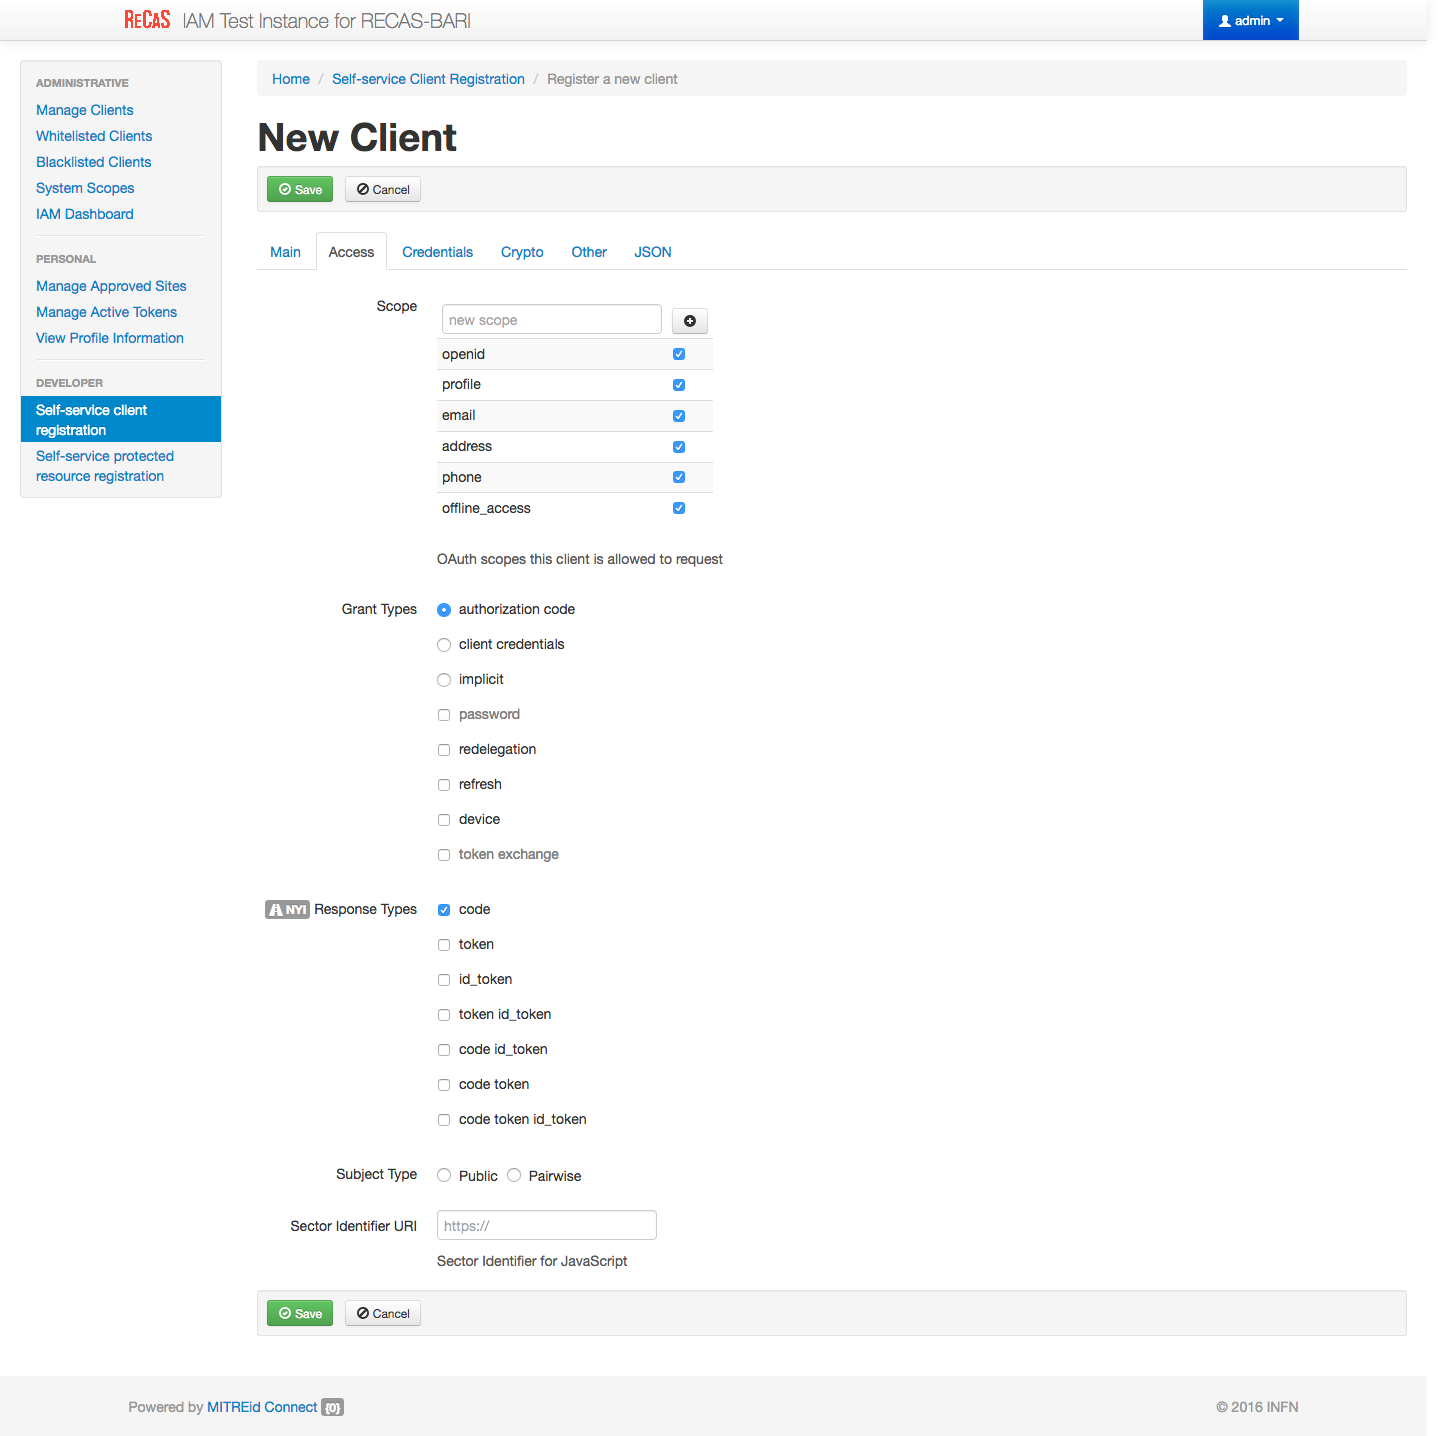
In the Access tab select the follwing Scopes
Scopes: openid, profile, email, address, phone, offline_access
Save the client.
Save Client ID, Client Secret and Registration Access Token or the full output json in the JSON tab for future access.
Installation
Create the file indigopaas-deploy/ansible/inventory/group_vars/orchestrator-dashboard.yaml with the following configured values:
dashboard_fqdn: <dashboard_vm_dns_name>
dashboard_image_name: laniakeacloud/laniakea-dashboard

dashboard_iam_issuer: "https://<iam_address>/"
dashboard_iam_client_id: "<im_client_id>'"
dashboard_iam_client_secret: "<iam_client_secret>"
dashboard_orchestrator_url: "https://<proxy_vm_dns_name>/orchestrator"
dashboard_slam_url: "https://<slam_vm_dns_name>:8443"
dashboard_cmdb_url: "https://<proxy_vm_dns_name>/cmdb"
dashboard_im_url: "https://<proxy_vm_dns_name>/im"

dashboard_tosca_template_repository_url: https://github.com/Laniakea-elixir-it/laniakea-dashboard-config.git
dashboard_tosca_template_repository_dir: "/opt/laniakea-dashboard-config"
dashboard_tosca_templates_dir: "/opt/laniakea-dashboard-config/tosca-templates"
dashboard_tosca_parameters_dir: "/opt/laniakea-dashboard-config/tosca-parameters"
dashboard_tosca_metadata_dir: "/opt/laniakea-dashboard-config/tosca-metadata"
dashboard_administrators: "['<valid_email_address>']"
dashboard_support_email: "['<valid_email_address>']"

dashboard_letsencrypt_email: "<valid_email_address>"

dashboard_enable_db: True
dashboard_db_sql_file_url: "https://raw.githubusercontent.com/Laniakea-elixir-it/orchestrator-dashboard/laniakea-stable/utils/orchestrator_dashboard.sql"
dashboard_mysql_root_password: ******
dashboard_db_password: ******

dashboard_enable_vault: True
dashboard_vault_token: "<vault_valid_token>"
dashboard_vault_iam_client_id: "vault_iam_client_id>"
dashboard_vault_iam_client_secret: "<vault_iam_client_secret"
Warning
Depending on your Cloud Provider network configuration, the database IP address needs to be further configured, for example using the private ip address associated to the VM, when a floating IP is used.
In this case it is possible to set the database IP address adding:
dashboard_db_host: '<vm_private_ip_address>'
Warning
Set also your custom mysql password with: dashboard_mysql_root_password and dashboard_mysql_password.
Note
A valid token to create policies and enable OIDC authentication on vault is needed. Here, for simplicity we use the root token gathered in the Vault installation section Hashicorp Vault.
Run the role using the ansible-playbook command:
# cd indigopaas-deploy/ansible

# ansible-playbook -i inventory/inventory playbooks/deploy-orchestrator-dashboard.yml
Video Tutorial
