CMDB and CPR
The Configuration Management DataBase (CMDB) is used to contain all the configuration items (CIs) that are valid to manage the infrastructure.
The Cloud Provider Ranker is a standalone REST WEB Service which ranks cloud providers.
CMDB and CPR are installed on the same machine.
Note
Current CMDB version: indigo_2
Note
Current CPR version: indigo_2
VM configuration
Create VM for CMDB and CPR. The VM should meet the following minimum requirements:
OS |
Ubuntu 16.04 |
vCPUs |
2 |
RAM |
4 GB |
Network |
Private IP address. |
Warning
All the command will be run from the control machine VM.
CMDB installation
Create the file indigopaas-deploy/ansible/inventory/group_vars/cmdb.yaml with the following configured values:
cmdb_crud_password: *****
cmdb_oidc_userinfo: https://<proxy_url>/userinfo
Run the role using the ansible-playbook command:
# cd indigopaas-deploy/ansible

# ansible-playbook -i inventory/inventory playbooks/deploy-cmdb.yml
CMDB installation video tutorial

CMDB configuration
The current version of CMDB is supporting set of configuration elements that are vital for INDIGO operations:
providers: organizational entity that owns or operates the services;
services (both computing and storage): main technical component description defining type and location of technical endpoints;
images: local service metadata about mapping of INDIGO-wide names of images, which are necessary to translate TOSCA description into service specific request.
CMDB needs to be populated with IaaS provider, services and images information.
Warning
SSH on CMDb virtual machine.
Create a directory called cmdb-data
# mkdir cmdb-dataCreate the file
cmdb-data/provider.json{ "_id": "", "data": { "name": "", "country": "", "country_code": "", "roc": "", "subgrid": "", "giis_url": "", "owners": [ "" ] }, "type": "provider" }
The _id field identifies the Cloud Provider and can be set as preferred
Warning
The provider owners list requrires at least a valid mail address, since this user has to be used for the resource negotiation procedure, during SLAM configuration (see section SLA Manager (SLAM))
Create the file
cmdb-data/service.json{ "_id": "", "data": { "service_type": "", "endpoint": "", "provider_id": "", "region": "", "sitename": "", "hostname": "", "type": "compute" }, "type": "service" }
Here the _id string identifies the service and can be set as preferred. On the contrary, the
provider_idis the_idpreviously set in the provider.json file.Create the file
cmdb-data/image.json{ "type": "image", "data": { "image_id": "", "image_name": "", "architecture": "", "type": "linux", "distribution": "ubuntu", "version": "16.04", "service": "" } }
where the
ìmage_idis the image ID on the Cloud Provider Manager, e.g. OpenStack.The service field has to be set with the
_idset in the service.json file.Note
The
image_namefield is the parameter which is used in the image field in the tosca template to identify the image to use (see section Galaxy template)Add providers, services and images to CMDB.
Create the file
cmdb-add-data.shwith the content:#!/bin/bash source /etc/cmdb/.cmdbenv if [[ -z "$CMDB_CRUD_USERNAME" ]]; then echo ENV variable CMDB_USER not set exit 1 fi if [[ -z "$CMDB_CRUD_PASSWORD" ]]; then echo ENV variable CMDB_PASSWORD not set exit 1 fi if [[ -z "$1" ]]; then echo " usage: $0 <json> " exit 1 fi
give it execution permissions:
chmod +x cmdb-add-data.sh
Finally you can upload informations to cmdb using curl:
curl -X POST http://cmdb:<cmdb_crud_password>@localhost:5984/indigo-cmdb-v2 -H "Content-Type: application/json" -d@cmdb-data/provider.json

curl -X POST http://cmdb:<cmdb_crud_password>@localhost:5984/indigo-cmdb-v2 -H "Content-Type: application/json" -d@cmdb-data/service.json

curl -X POST http://cmdb:<cmdb_crud_password>@localhost:5984/indigo-cmdb-v2 -H "Content-Type: application/json" -d@cmdb-data/image.json
Check on CMDB couchDB if your configuration has been uploaded from your browser at the following endpoint:
https://<proxy_url>/couch/_utils/database.html?indigo-cmdb-v2
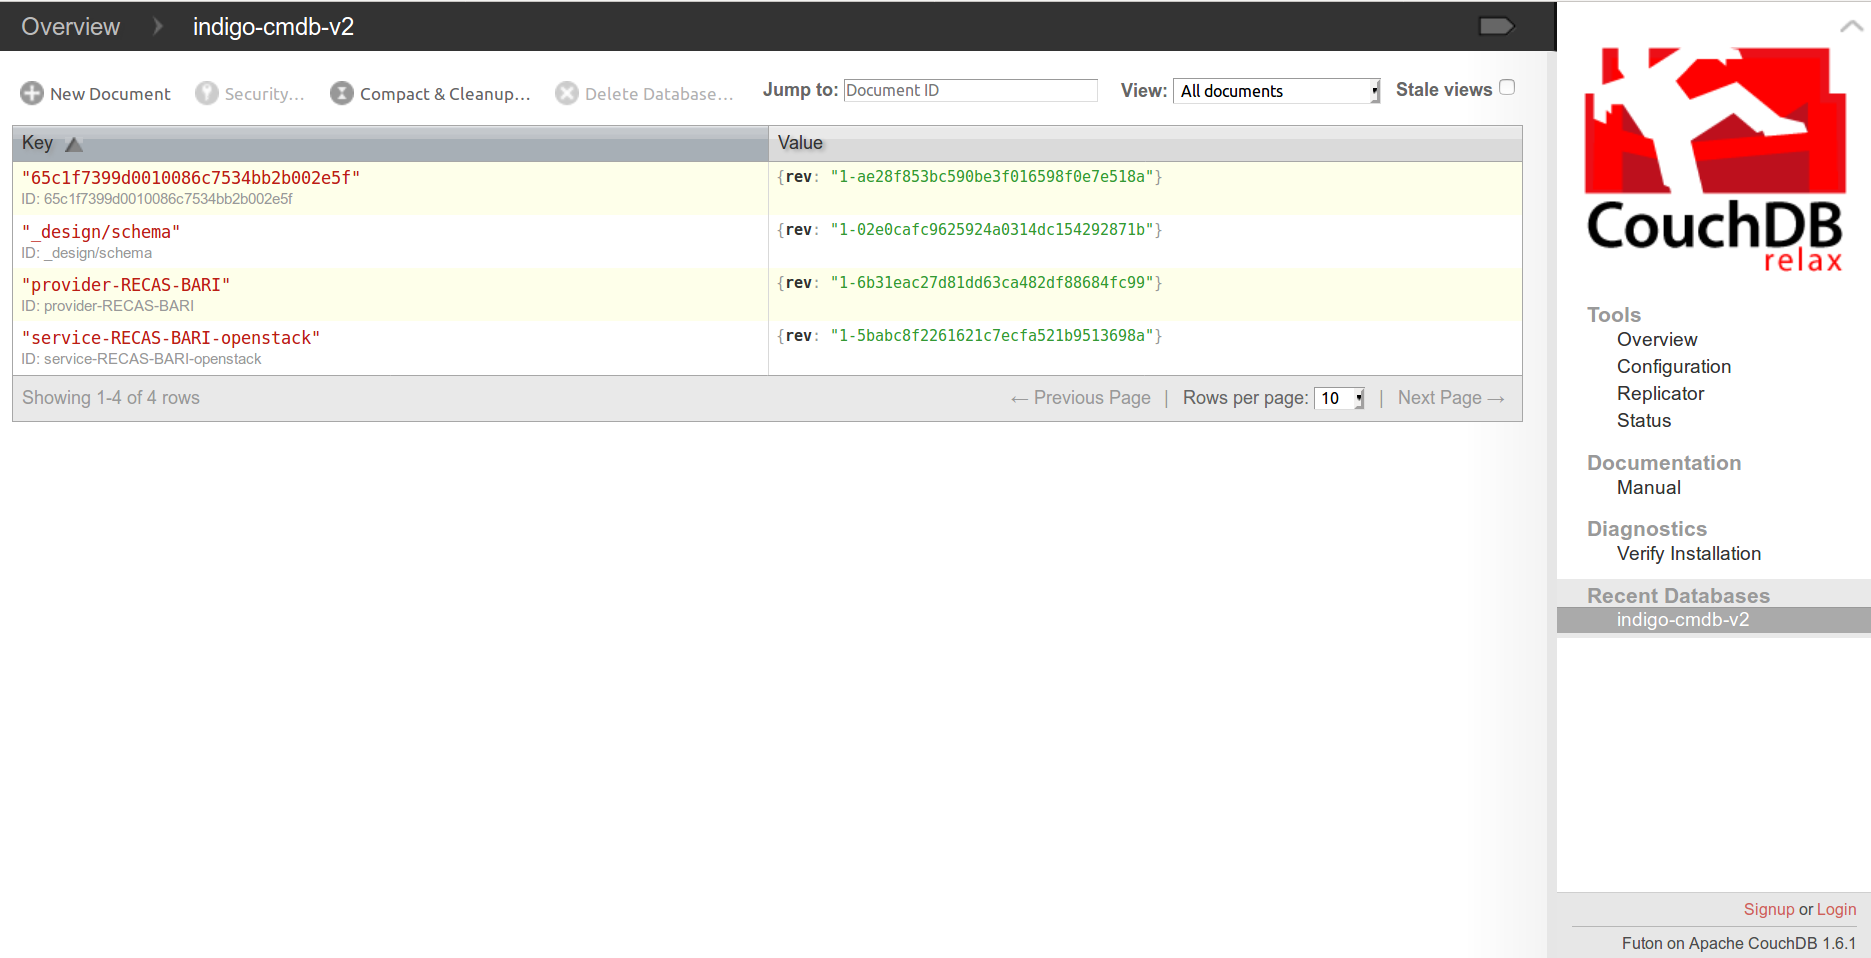
CMDB couchDB after the configuration process with provider, service and image.
Note
All CMDB image are listed at the address: https://<proxy_url>/cmdb/image/list?include_docs=true
CMBD configuration json example
These are the configuration files used for Laniakea@ReCaS service, the Laniakea installation at the ReCaS Datacenter:
provider.json
{
   "_id": "provider-RECAS-BARI",
   "data": {
       "name": "RECAS-BARI",
       "country": "Italy",
       "country_code": "IT",
       "roc": "NGI_IT",
       "subgrid": "",
       "giis_url": "ldap://cloud-bdii.recas.ba.infn.it:2170/GLUE2DomainID=RECAS-BARI,o=glue",
       "owners": [ "*****" ]
   },
   "type": "provider"
}
service.json
{
   "_id": "service-RECAS-BARI-openstack",
   "data": {
       "service_type": "eu.egi.cloud.vm-management.openstack",
       "endpoint": "https://cloud.recas.ba.infn.it:5000/v3",
       "provider_id": "provider-RECAS-BARI",
       "region": "recas-cloud",
       "sitename": "RECAS-BARI",
       "hostname": "cloud.recas.ba.infn.it",
       "type": "compute"
   },
   "type": "service"
}
image.json
{
   "type": "image",
   "data": {
       "image_id": "8f667fbc-40bf-45b8-b22d-40f05b48d060",
       "image_name": "RECAS-BARI-ubuntu-16.04",
       "architecture": "x86_64",
       "type": "linux",
       "distribution": "ubuntu",
       "version": "16.04",
       "service": "service-RECAS-BARI-openstack"
   }
}
CMDB configuration video tutorial

CPR installation
CPR does not need any configuration. Run the role using the ansible-playbook command:
# cd indigopaas-deploy/ansible

# ansible-playbook -i inventory/inventory playbooks/deploy-cpr.yml
CPR video tutorial
